
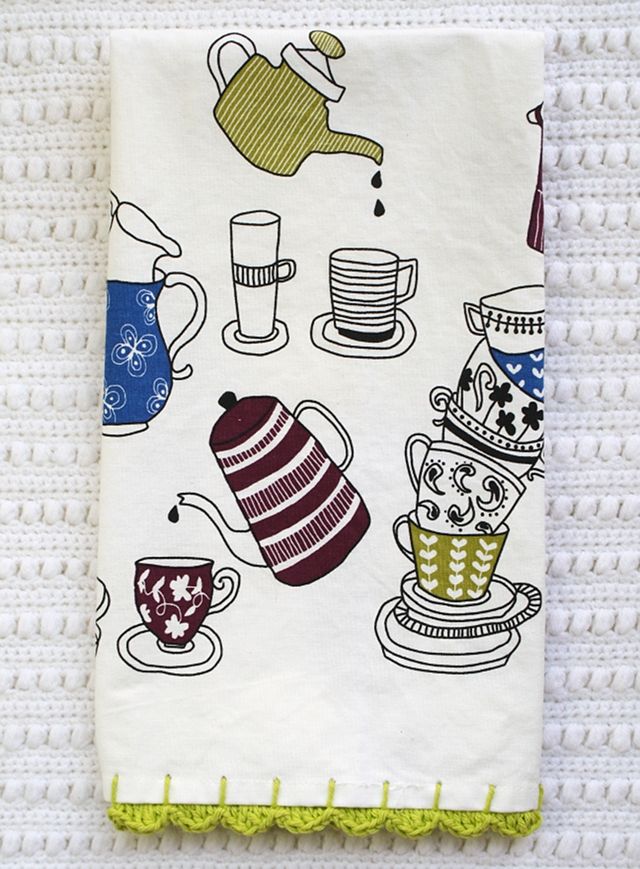
Adding a Crochet Edge to a Tea Towel
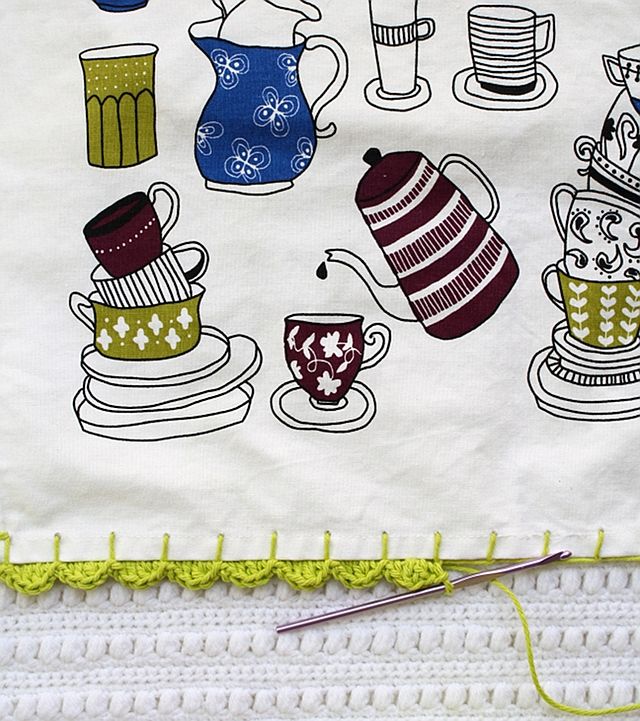
Yesterday it was tea cake and today it's a tea towel! This crochet project came to me out of nowhere. Usually I have to doodle on the side of my notes for weeks, just waiting for a new idea. This time around I was hit with it like *bam* while my mom and I were just hanging around the kitchen on Friday. I was looking at this tea towel hanging from the cabinet and suddenly remembered that beautiful embroidered fabric with the crochet edge I posted about a few weeks ago. Eureka! I couldn't wait to add a little crochet to an already adorable tea towel. Although, I think it looks ten times cuter with the scalloped, crochet edge!
Materials:
- Tea towel
- Pencil
- Yarn
- Crochet hook
- Sewing needle
- Tapestry needle
- Scissors
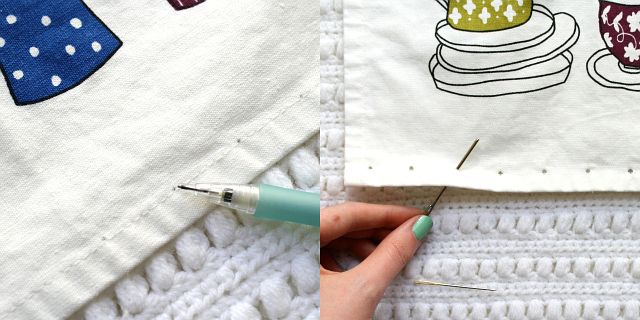
First I marked off pencil dots across the bottom of the towel, each one inch apart. Then I used a regular sewing needle to pierce the fabric and a tapestry needle to make the hole a little bigger to fit the crochet hook.
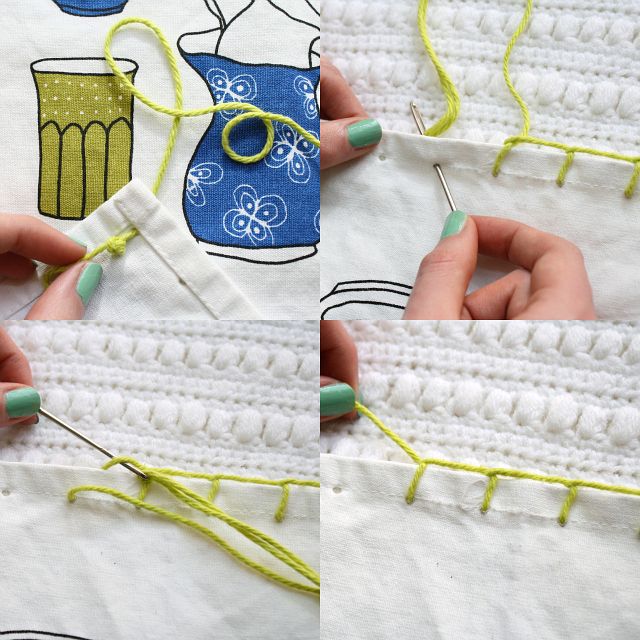
After I finished making the holes I tried to use the same method of adding crochet to fabric as in my paper crochet edge tutorial. That didn't work so well because it was too tight and it squished and warped the edge. I started looking around the internet and found this great crochet pillowcase project from You Go Girl. Instead of simply crocheting directly onto the fabric, she starts with a blanket stitch (photographed above) using the yarn and tapestry needle. This gave the crochet edge a stable starting point. I used my own variation of the stitch for this project.
- Use a separate length of yarn that is long enough for the tea towel edge
- Make a knot at one end and bring the yarn through the first hole
- (For the corners, repeat the following steps twice)
- Bring the yarn up through the hole and up again through the loop behind it
- Continue all the way across and secure
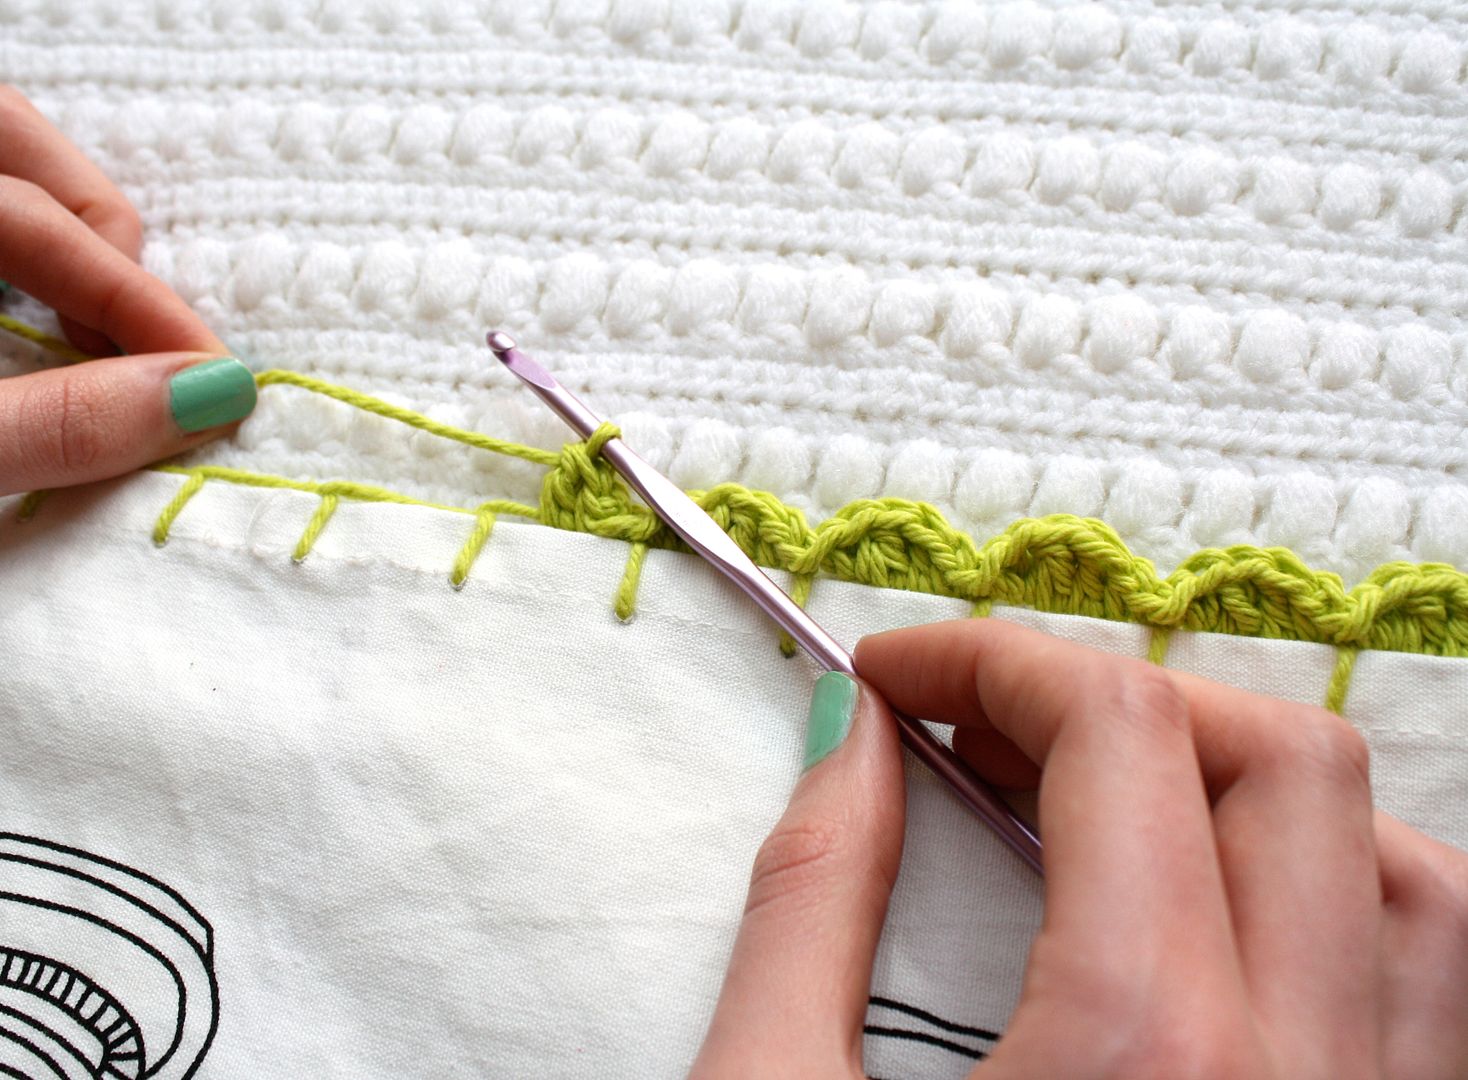
Next I added the crochet edge pattern:
- Join the yarn with a slip stitch to the blanket stitch base
- In the same space, add 1 single crochet, 2 double crochet, 1 single crochet and end with a slip stich
- Continue this pattern in each space to the end of the tea towel
- Sew in the loose ends with the tapestry needle and use the scissors to snip off the excess!

I really love how this turned out! It is such a simple project and another great way to use up little bits of yarn to make something look extra special. I can't wait to give a few of my other tea towels a new crochet look.
I've said this once and I'll say it again....when I start adding yarn to really weird things like...a desk in a classroom maybe...somebody needs to stop me! Wait... ;-)
I always have my eyes open for my next project. Who knows what my next yarn-covered victim will be!